

If you have ever built a new PC only to find your motherboard won’t boot because it doesn’t recognize your latest-generation processor, you know the frustration. Fortunately, learning how to update motherboard BIOS without a CPU is a lifesaver for enthusiasts. Many modern boards include a dedicated feature that allows you to flash the firmware using nothing more than a power supply and a thumb drive.
This capability saves you from the headache of borrowing an older, compatible chip just to perform a simple software update. By following the right sequence, you can get your system running and ensure full motherboard socket compatibility for your hardware.
Understanding BIOS Flashback Technology
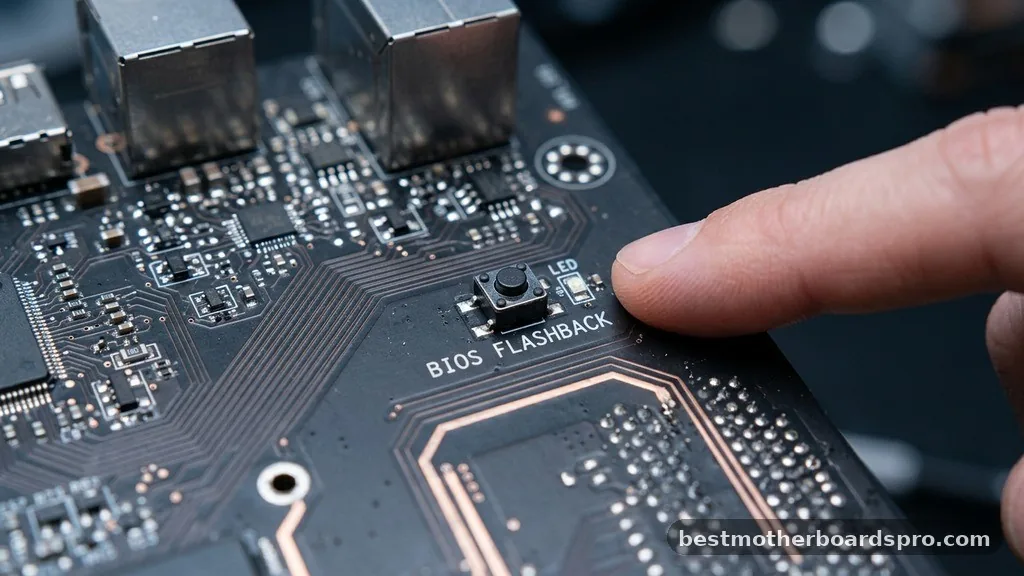
BIOS Flashback is a proprietary feature found on many mid-to-high-end motherboards that permits firmware flashing without requiring a processor, RAM, or a graphics card. It bypasses the standard boot process by utilizing a dedicated microcontroller on the board. This chip communicates directly with the BIOS chip, allowing it to write new data even when the system is effectively “dead.”
When you initiate this process, the motherboard firmware is overwritten with the version stored on your external media. This is essential when you purchase a motherboard that was manufactured before your CPU was released. Without this feature, the board simply wouldn’t know how to talk to your processor, leaving you stuck with a black screen and no way to enter the standard setup menus.
Preparing Your Hardware and USB Drive
Before you touch any cables, you must prepare the environment for a successful flash. The most critical component is the USB flash drive. Most motherboards are quite picky about the storage media used for this task.
You should ensure your drive is formatted to the FAT32 file system. While many modern drives use exFAT or NTFS, the low-level flashing environment rarely supports these formats.
Furthermore, the partition scheme matters. Using an MBR partition scheme is generally safer than GPT for these specialized recovery tools. Once formatted, you need to download the correct BIOS file from the manufacturer support site.
This file is often compressed, so remember to extract it. Crucially, many manufacturers require a specific BIOS file rename before the board will recognize the update. Check your specific motherboard manual to see if you need to rename the file to something like “MSI.ROM” or “GIGABYTE.BIN.”
Step-by-Step Execution of the Flash Process
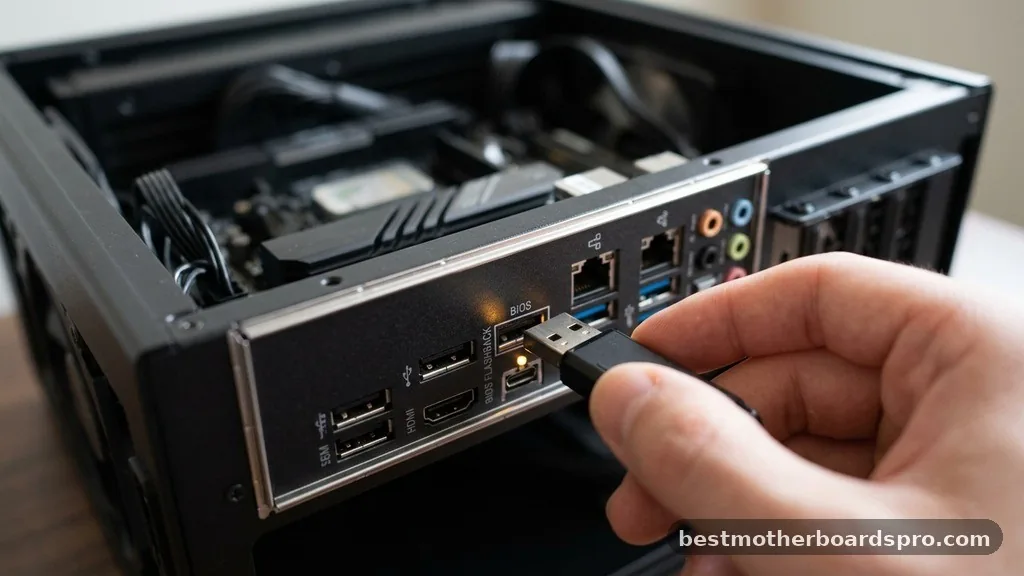
Once your drive is ready, the physical setup requires minimal components. You only need to connect the 24-pin ATX connector and the 8-pin EPS CPU power cable from your power supply unit to the motherboard.
You do not need to install the CPU, RAM, or any other peripherals. Once the power supply is connected, flip the switch on the back of the PSU to provide standby power to the board.
Insert the USB drive into the specific port labeled “BIOS” or “Flashback.” This port is often highlighted in a different color or marked with a small border. Press the flashback button located on the rear I/O panel.
You will see an LED indicator start to blink, signaling that the motherboard is reading the file and writing it to the CMOS. Do not interrupt this process under any circumstances. If the power cuts out while the flash is in progress, you risk bricking the motherboard permanently.
| Component | Requirement |
|---|---|
| USB Format | FAT32 (Required) |
| Partition Scheme | MBR (Recommended) |
| Power Cables | 24-pin ATX & 8-pin EPS |
| File Naming | Specific per manufacturer |
Why BIOS Updates Sometimes Fail
Even with the right steps, users occasionally encounter issues. The most common culprit is an incompatible USB drive.
Some high-capacity or USB 3.2 drives may not communicate correctly with the board’s limited internal controller. If the LED indicator flashes for a split second and then turns solid or stops entirely, the board isn’t reading your file.
Try using a smaller, older USB drive—ideally 8GB or 16GB—as these are more likely to be compatible with the older, more stable FAT32 standards. Another common issue involves using the wrong USB port. Always double-check your motherboard manual to ensure you are using the specific port designated for BIOS recovery, as other ports on the I/O panel are wired to the chipset rather than the recovery controller.
Addressing Common Gaps in BIOS Knowledge
Many users wonder if they can perform this update without a dedicated flashback button. The short answer is generally no. If your motherboard lacks a specific “Flashback” or “Q-Flash Plus” button, the system must be able to boot into the UEFI/BIOS interface to trigger the update.
If you don’t have a CPU, there is no way to reach that interface. In such scenarios, your only options are to contact the manufacturer to see if they offer a pre-flashed BIOS chip replacement or to visit a local computer shop that can perform the update for you.
Another frequent concern is whether the CMOS needs to be cleared before or after the update. While the update process typically overwrites the existing firmware, performing a clear CMOS—by removing the watch-style battery for a few minutes—is a good practice if you encounter boot loops after the flash. This ensures that any leftover settings from a previous, incompatible configuration don’t interfere with the new firmware.
- Always verify your motherboard revision number; boards with the same model name often have different hardware revisions.
- Ensure your power supply unit is reliable; a failing PSU can cause unstable voltage during the flash.
- Keep the USB drive inserted until the LED indicator stops blinking entirely.
- Check the manufacturer support site for specific “Flashback” instructions unique to your board series.
Frequently Asked Questions
Is it safe to update the BIOS without a processor installed?
Yes, it is perfectly safe as long as your motherboard supports dedicated BIOS Flashback technology. This feature is designed specifically to allow firmware updates without a CPU or RAM, provided the board is receiving power from the power supply unit and the file is named and formatted correctly.
What happens if the power cuts during the update?
If power is lost during the flash, the BIOS chip may become corrupted, rendering the motherboard unbootable. This is why you must ensure a stable power connection. If this occurs, you may need to use a hardware programmer or seek professional repair to restore the firmware chip.
How do I know if the update was successful?
Success is typically indicated by the LED light on the motherboard. During the process, it will blink rapidly.
Once the update completes, the light will either turn off or remain solid, depending on the manufacturer. You can then power down, install your components, and attempt to boot.
Can I use any USB drive for the BIOS file?
Not necessarily. Motherboards are often sensitive to USB drive specifications.
Using a drive formatted in FAT32 with an MBR partition scheme is essential. If the board fails to recognize the file, try a different USB drive, preferably one with a lower storage capacity, such as 8GB or 16GB.
Conclusion
Mastering the process of updating motherboard BIOS without a CPU is a valuable skill that bridges the gap between hardware generations. By using the dedicated Flashback feature, you remove the reliance on older components and ensure your system is ready for the latest processors. Remember to always verify your specific board’s requirements, use a properly formatted USB drive, and maintain a steady power supply throughout the update.
Once the indicator light confirms success, you are ready to assemble your PC with confidence. If you encounter any persistent issues, double-checking your motherboard manual or the manufacturer’s official support site is always the best next step to ensure your hardware is fully optimized for your build.



