


When building custom pcs, you might overlook the small hardware that keeps your system alive. Understanding what motherboard standoffs are is vital for anyone assembling their own computer, as these tiny components prevent catastrophic electrical shorts between your mainboard and the metal chassis. Without them, your build could fail before you even reach the BIOS screen.
These simple spacers act as the bridge between your hardware and the case, ensuring everything remains stable and safe. Learning how to properly identify and install these pieces is a rite of passage for any system builder, whether you are putting together an entry-level workstation or a high-end gaming rig.
The Fundamental Purpose of Standoffs
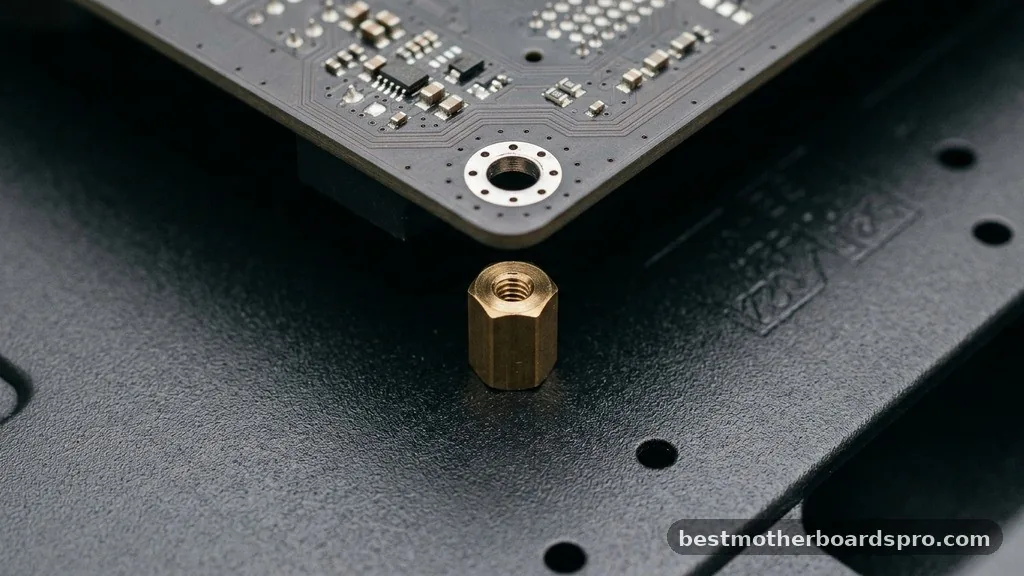
At their core, motherboard standoffs are small metal or plastic pillars that create a necessary gap between the back of your motherboard and the computer case. Without this clearance, the solder points on the underside of the board would make direct contact with the conductive metal of the case. This contact creates an immediate short circuit, which can permanently damage your components or prevent the system from booting entirely.
These accessories serve a dual purpose beyond mere electrical insulation. They provide a secure, elevated mounting point that aligns the input/output ports on the back of your board with the cutouts on the case’s IO shield. By keeping the board suspended, they also allow for better airflow behind the printed circuit board, which helps in dissipating heat generated by the power delivery components and other surface-mounted hardware.
Identifying Different Types of Standoffs
Not every system uses the same mounting hardware. You will typically encounter a few common variations when opening a new case or sorting through a spare parts kit. Most standoffs are made of brass, which provides excellent durability and a reliable ground connection to the case.
| Standoff Type | Common Configuration | Primary Use Case |
|---|---|---|
| Hex Standoff | Female-Female | Standard ATX, Micro-ATX, and Mini-ITX builds. |
| Male-Female Standoff | Threaded post and socket | Cases with pre-installed mounting points. |
| Plastic Standoff | Push-pin or clip-in | Tool-less case designs or legacy proprietary systems. |
| Adapter Standoff | Screw-in extension | Adjusting height for custom cooling or cable routing. |
The most common variant you will find in modern gaming systems is the hex-shaped brass standoff. These are designed to be screwed into the motherboard tray of your case. Once they are tightened, you place your board on top and secure it using small screws that thread directly into the female end of the standoff.
Why Standoff Placement Matters
Precise placement of your standoffs is just as important as installing them in the first place. Every motherboard has specific holes drilled for mounting, and these holes correspond to standard form factors like ATX, Micro-ATX, or Mini-ITX. If you leave an extra standoff in the case where there is no corresponding hole on your board, you risk causing a short circuit on the back of the PCB.
- Always consult your motherboard manual to identify the correct mounting hole layout.
- Remove any pre-installed standoffs that do not align with your specific board size.
- Ensure all standoffs are tightened firmly to the case to prevent vibration.
- Use a standoff tool or a small socket wrench to avoid stripping the threads.
- Check that no loose screws are trapped beneath the board after installation.
Taking the time to verify your layout before dropping the board into the case saves you from the frustration of having to disassemble your entire machine later. It is a small step, but it is one of the most critical parts of the assembly process.
Common Installation Mistakes and How to Avoid Them
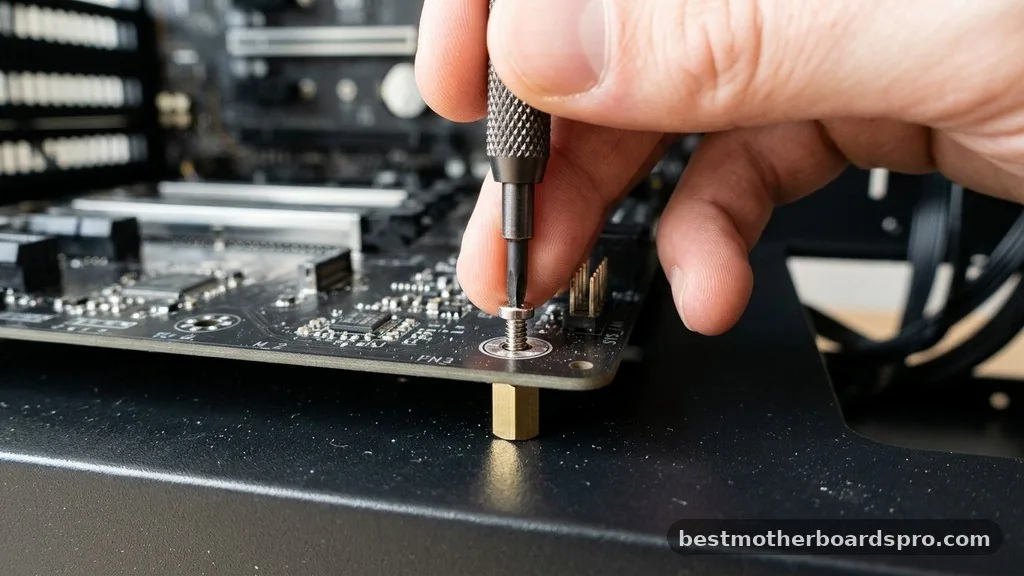
The most common error builders make is failing to use the right amount of force or using the wrong screw thread. Standoffs screws usually come in two standard thread pitches, and forcing the wrong one can strip the brass threads instantly. If the screw feels like it is fighting you, stop immediately and check if you have the right hardware from your kit.
Another recurring issue is “over-tightening.” While you want the standoff secure, using excessive torque on the motherboard screw can crack the solder mask or damage the traces around the mounting hole.
Tighten them until they are snug, then give them a slight turn—there is no need to make them immovable. If you are worried about vibration, a tiny amount of thread-locker can help, but it is rarely necessary for home computer builds.
Addressing Topical Gaps in Standoff Knowledge
Many builders ask if metal standoffs are always safe. The answer is yes, provided they are installed in the designated spots.
These standoffs are designed to create a ground path, which is actually beneficial for the system. They help dissipate static electricity away from the motherboard components.
Another common gap involves what to do if you have lost your standoffs. Never try to mount a motherboard directly to the metal case, and do not use makeshift materials like rubber spacers or tape. You can easily purchase a universal kit online that includes various sizes and thread types.
These kits are inexpensive and usually contain enough hardware to last through several builds. If you are working with a legacy system, you might need to hunt for specific male-to-female adapters, but for modern builds, the standard 6-32 or M3 thread types are almost universal.
FAQ Section
Are motherboard standoffs strictly necessary?
Yes, motherboard standoffs are essential. They provide the necessary physical gap between the board and the metal chassis to prevent electrical shorts. Without them, the conductive underside of the board will touch the case, leading to potential hardware failure or an inability to power on the system.
What happens if I forget to install standoffs?
If you mount a motherboard directly onto the metal case without standoffs, you will likely cause a short circuit as soon as the power supply is engaged. This can permanently damage the motherboard, the CPU, or other connected components, and it is a common cause of “dead on arrival” builds.
Can I use plastic standoffs instead of brass ones?
Plastic standoffs are sometimes used in specific cases or for mounting non-conductive components, but brass is the industry standard for motherboards. Brass standoffs are stronger, provide a better ground connection, and ensure the board remains rigid and stable even when you are plugging in heavy cables or graphics cards.
How do I know which standoff holes to use?
Check the mounting holes on your motherboard and compare them to the labels on your case’s motherboard tray. Most cases are stamped with letters like A, M, or I, indicating holes for ATX, Micro-ATX, or ITX boards. Match these letters to the holes on your specific motherboard.
Closing Thoughts on System Stability
Building your own computer is a rewarding process, and paying attention to the small details like motherboard standoffs ensures your work lasts for years. These components might seem minor, but they are the literal foundation upon which your entire system rests. By taking the time to verify your mounting points and ensuring every screw is seated correctly, you create a stable and reliable environment for your high-performance hardware.
Should you find yourself unsure during the assembly process, always refer back to your case and motherboard manuals for the specific requirements of your hardware. With the right approach to these small parts, you will have a rock-solid machine ready for any task you throw at it.



