


If you have ever peered inside your computer case while upgrading components or troubleshooting thermal issues, you have likely spotted a series of labeled pins on the PCB. Among these, the connector labeled as the SYS fan on motherboard hardware stands out as a fundamental component for managing airflow.
Often abbreviated as “System Fan,” this header is designed to power and control the various cooling devices that keep your internal components from overheating. Understanding how these pins function is essential for anyone looking to optimize their PC’s thermal performance or simply perform routine maintenance on their custom build.
Many users overlook these headers until they need to add more cooling, but they are vital for system longevity. By connecting your auxiliary case fans to these specific ports, you gain the ability to monitor their status and adjust their speed directly through the BIOS or software. This article breaks down exactly what these connectors do, how they differ from other headers, and how you can use them to ensure your machine stays cool under pressure.
Understanding the Role of System Fan Headers
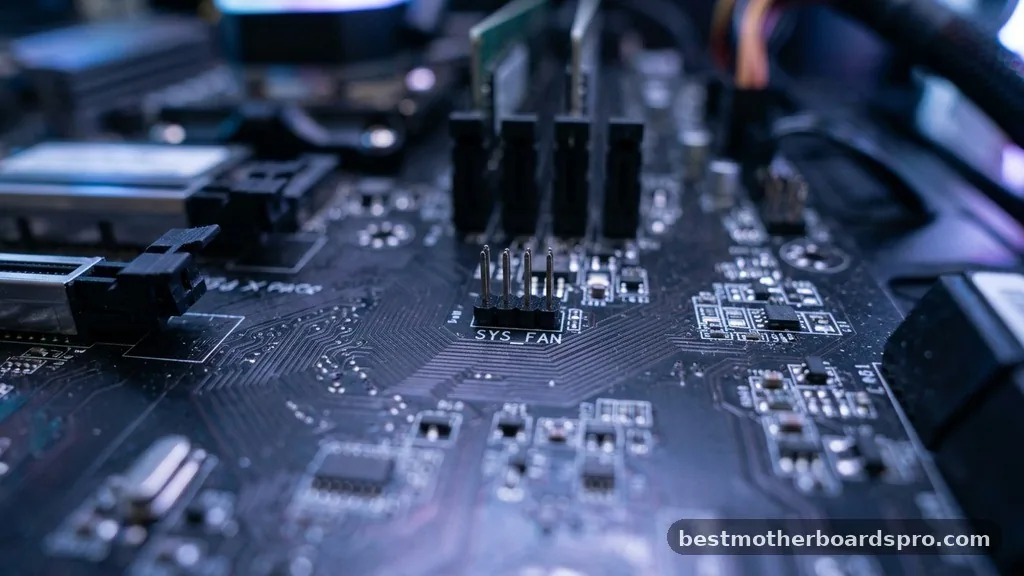
The SYS fan on motherboard circuitry acts as the primary interface for your computer’s auxiliary cooling. Unlike the dedicated CPU fan header, which is prioritized for the processor’s cooler, these system headers are meant for the fans mounted to the chassis. Their main job is to move air through the case, removing hot air generated by the GPU, motherboard components, and storage drives.
Most modern boards feature multiple headers labeled as SYS_FAN1, SYS_FAN2, and so on. These pins provide both power and control signals to your fans. When you plug a fan into one of these, the motherboard can detect its rotational speed—measured in RPM—and adjust the voltage or pulse-width modulation (PWM) signal to maintain an ideal balance between noise and temperature.
Distinguishing Between Fan Header Types
It is easy to get confused by the various labels found on a circuit board. While they might look identical, they often serve different purposes. The following table highlights the primary differences you might encounter while building or upgrading your system.
| Header Label | Primary Purpose | Control Capability |
|---|---|---|
| CPU_FAN | Processor Cooling | High priority, BIOS-managed |
| SYS_FAN / CHA_FAN | Case/Chassis Cooling | Variable speed based on system temp |
| PUMP_FAN / W_PUMP | Liquid Cooling Pumps | Full speed or custom curve |
| PWR_FAN | Power Supply Monitoring | Limited or no speed control |
Why You Should Use SYS Fan Headers
Using the correct header is not just about keeping your wires tidy. When you connect a fan to a dedicated header, you allow the system to manage its speed intelligently.
If you were to plug a case fan directly into the power supply via a Molex or SATA adapter, the fan would typically run at 100% speed all the time. This leads to unnecessary noise and premature wear on the fan bearings.
By utilizing the motherboard headers, you can create custom fan curves. You might want your fans to stay quiet while you are just browsing the web, but spin up to full speed when you start a demanding video game or rendering task. This level of control is only possible when the fan is connected to a manageable header that communicates with the motherboard’s firmware.
Common Technical Configurations
When looking at the physical connection, you will usually see either 3-pin or 4-pin configurations. Understanding the difference is important if you want to take full advantage of your hardware.
- 3-Pin Headers: These rely on voltage regulation to change fan speeds. The motherboard reduces or increases the voltage supplied to the motor, which changes the speed of the blades.
- 4-Pin Headers: These support PWM (Pulse Width Modulation). A dedicated fourth pin sends a signal that tells the fan how fast to spin, allowing for much finer control and lower minimum speeds compared to voltage regulation.
- Compatibility: You can almost always plug a 3-pin fan into a 4-pin header. The connector is keyed so it only fits one way, and the motherboard will simply treat it as a voltage-controlled fan.
Addressing Common Misconceptions
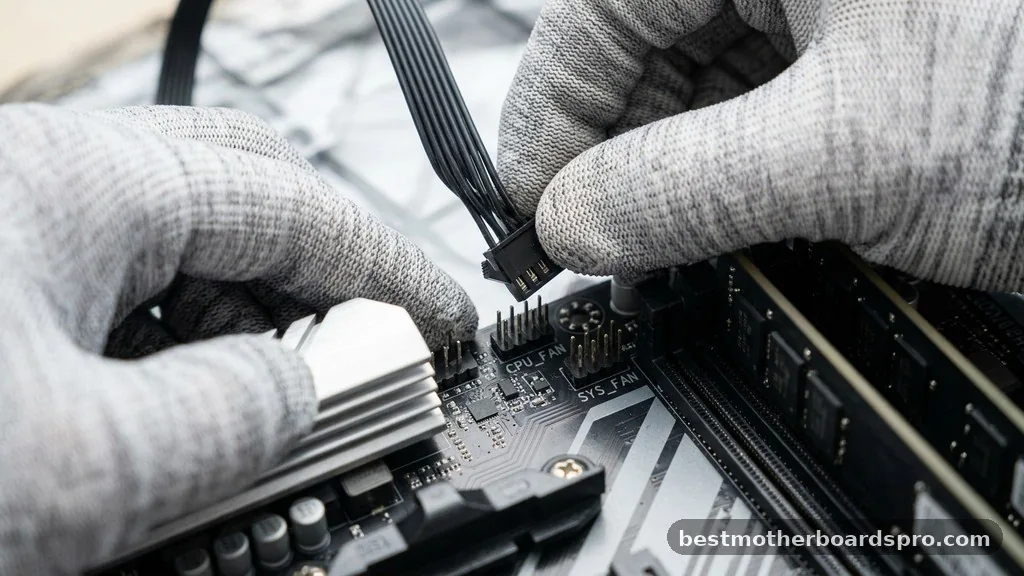
A frequent point of confusion involves whether you can swap fan headers. For example, people often ask if they can put a CPU fan into a SYS fan header. Technically, the physical connector will fit, but it is generally a bad idea.
The CPU fan header is programmed to monitor the processor’s temperature sensors specifically. If the motherboard does not detect a fan connected to the CPU_FAN header, it may throw a “CPU Fan Error” at startup, potentially preventing the system from booting for safety reasons.
Another common question is whether it matters which specific SYS fan header you choose. For most standard case fans, the answer is no. They are functionally identical.
However, if you are using high-performance fans that pull a lot of power, you should check your motherboard manual to ensure you aren’t exceeding the amperage limit of the header. Most headers are rated for 1 Amp; exceeding this can damage the motherboard traces.
Maximizing Airflow Efficiency
To make the most of your cooling setup, consider the physical placement of your fans. A common mistake is installing all fans to blow inward or all to blow outward.
You want to create a consistent path of airflow through the chassis. Usually, this means intake fans at the front and bottom, with exhaust fans at the back and top.
Since heat rises, having an exhaust fan near the top of the case is a great way to clear out trapped air. By connecting these to your SYS fan headers, you can sync their performance with your internal temperatures. If you notice your case getting particularly warm, you can adjust the fan curve in your BIOS to increase the duty cycle of your exhaust fans, pulling more heat away from your components.
Troubleshooting Fan Issues
Sometimes, you might find that a fan isn’t spinning or is making an unusual noise. If a fan connected to a SYS fan header fails to turn on, first check the BIOS settings. It is possible the header has been disabled or set to a “Zero RPM” mode, which keeps fans off until a certain temperature threshold is reached.
If the BIOS doesn’t show the fan at all, double-check the connection. It is surprisingly easy to offset the connector by one pin, especially in cramped cases. If the connection is secure and the fan still doesn’t spin, try plugging it into a different header.
If it works there, you may have a faulty header on your motherboard. If it still doesn’t work, the fan itself might be defective.
Frequently Asked Questions
Is it safe to use a fan splitter on a SYS fan header?
Yes, it is generally safe to use a fan splitter, provided you don’t exceed the total current draw limit of the header, which is typically 1 Amp. Check your fan specifications to ensure the combined amperage of the connected fans stays well below this threshold to avoid damaging the motherboard.
What happens if I plug my CPU fan into a SYS fan header?
Your computer will likely display a “CPU Fan Error” during the boot process because the BIOS expects a fan on the primary CPU header. While the fan will still spin and cool the processor, you will have to bypass the warning in the BIOS settings every time you start.
Can I control the speed of 3-pin fans on a 4-pin header?
Yes, most modern motherboards allow you to control 3-pin fans through a feature called DC mode or Voltage control in the BIOS. While you lose the precision of PWM, you can still adjust the voltage to change the speed, effectively allowing you to quiet down older fans.
How do I know if my SYS fan header is PWM or DC?
You can usually check this in your motherboard’s BIOS or UEFI utility. Most modern boards are hybrid, meaning they can detect the fan type automatically. If you are unsure, look at the pins; if there are four pins, it is likely a PWM-capable header that can also handle DC.
Optimizing Thermal Management
Learning how to manage the cooling system within your computer is one of the most rewarding parts of maintaining a custom build. By properly utilizing the SYS fan on motherboard headers, you can ensure that your components remain cool, quiet, and reliable for years to come. Whether you are adding a new exhaust fan to improve airflow or simply adjusting your fan curves to reduce noise during idle periods, these headers provide the granular control you need.
Take a few minutes to explore your BIOS settings, as that is where the real magic happens. Setting up a custom curve that ramps up based on specific temperature sensors will make a massive difference in your daily computing experience. If you ever find yourself struggling with high temperatures, remember that your motherboard is designed to give you the tools to fight back.
Start by checking your connections, verifying your settings, and ensuring your airflow path is unobstructed. Enjoy the process of fine-tuning your machine to your exact preferences.



