

When your computer refuses to boot or behaves erratically after a hardware upgrade, performing a reset on the motherboard is often the most reliable way to restore stability. By clearing the stored configuration, you essentially force the system to detect your hardware components from scratch, which resolves many common startup failures.
Whether you are dealing with an overclocking mishap or a corrupted configuration, learning the proper sequence for resetting the firmware is a valuable skill for any PC user. This process is generally safe, provided you follow the correct precautions to avoid electrostatic discharge and ensure the hardware is handled with care during the procedure.
Understanding the Role of the CMOS
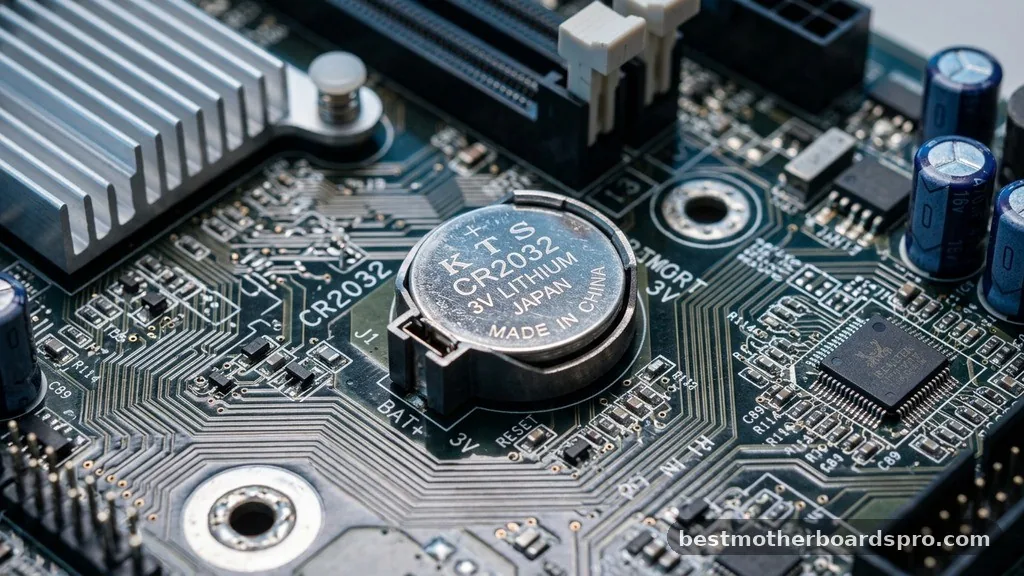
The motherboard relies on a small amount of volatile memory to keep track of your hardware configuration, date, and time. This memory, known as CMOS, is powered by a small coin-shaped battery located directly on the board.
When you decide to reset your motherboard, you are essentially interrupting the power supply to this memory module to wipe the stored data. Once the power is cut, the firmware reverts to its factory-default state, discarding any custom voltages, fan curves, or boot sequences that might be causing the current issue.
Safety Precautions Before You Begin
Before touching any internal components, you must prioritize safety to protect your hardware. Static electricity can permanently damage sensitive chips, so always touch a grounded metal object or wear an anti-static wrist strap before opening your computer case.
You should also ensure the system is completely powered down and disconnected from the wall outlet. Never attempt to manipulate the internal components while the power cable is still plugged into the wall, as this creates a significant risk of electrical shorting or injury.
- Power down the computer completely using the operating system shut-down command.
- Unplug the power cord from the back of the power supply unit.
- Press and hold the power button for ten seconds to drain residual electricity from the capacitors.
- Open the side panel of your computer case to gain access to the motherboard.
Method One: Using the CMOS Battery
Removing the battery is the most universally applicable technique for clearing settings. Most motherboards utilize a CR2032 coin cell, which maintains the configuration when the PC is unplugged. To perform this reset, locate the battery, gently release the metal retention clip, and let the battery pop out.
You should wait at least five minutes before reinserting it to ensure the residual charge in the capacitors has fully dissipated. This method is highly effective for systems that lack a dedicated reset button or jumper.
| Method | Difficulty Level | Best For |
|---|---|---|
| Removing Battery | Easy | Older systems and general troubleshooting |
| Jumper Reset | Moderate | Modern boards with clear pins |
| Dedicated Button | Very Easy | High-end enthusiast motherboards |
Method Two: Using the Clear CMOS Jumper
Many modern motherboards feature two or three pins labeled as CLR_CMOS or JBAT1. These pins are designed specifically for the purpose of resetting the configuration without requiring you to remove the battery. To use this, you need a small jumper cap or a flat-head screwdriver.
By bridging these two pins while the system is off, you create a direct path that discharges the memory instantly. Always consult your motherboard manual to ensure you are shorting the correct pins, as touching the wrong ones could potentially cause damage to the board.
Method Three: The Dedicated CMOS Button
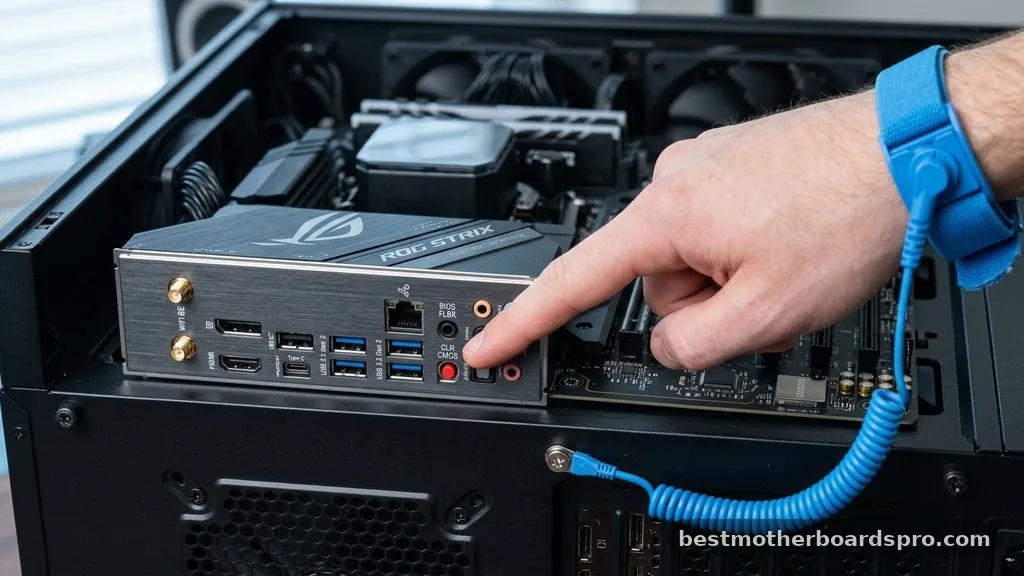
High-end and enthusiast-grade motherboards often include a dedicated button on the rear I/O panel or directly on the PCB. This is the most convenient way to reset the motherboard, as it requires no tools and minimal effort. Simply press and hold the button for a few seconds while the computer is disconnected from the power.
If your board has this feature, it will usually be clearly marked with a “Clear CMOS” or “Reset” icon. This button is a lifesaver for users who frequently experiment with aggressive memory timings or CPU overclocking.
Addressing Common Troubleshooting Gaps
Sometimes, a simple reset does not immediately fix the underlying issue. If the system still fails to post after you have cleared the CMOS, you may need to inspect the RAM sticks. Try reseating the memory modules by removing them and clicking them back into the slots firmly.
Additionally, ensure that your graphics card is properly seated in the PCIe slot, as a loose connection here is a frequent culprit for black screens. If the motherboard still shows an error light, check the manual for the specific LED diagnostic codes, which can point you toward a failing component rather than a simple configuration error.
What to Do After the Reset
Once you have successfully cleared the settings, plug the power cable back in and turn on the computer. You will likely see a message on your screen indicating that the configuration has been reset and prompting you to enter the setup utility.
You must press the designated key—usually Delete or F2—to enter the interface and verify that your date, time, and boot priority are correct. If you were using an XMP profile for your memory, you will need to re-enable it, as the reset will have reverted your RAM speed to the default JEDEC standard.
FAQ
Will I lose my files if I reset the motherboard?
No, resetting the motherboard does not affect your personal files or data stored on your hard drives or SSDs. The process only clears the temporary configuration settings stored in the BIOS memory, such as hardware clock speeds and boot priorities, leaving your operating system and documents entirely untouched.
What should I do if my computer still won’t boot after a reset?
If the system fails to boot after a reset, check your hardware connections, including the RAM and graphics card. Ensure all cables are firmly seated. If you still see no display, the issue might be a faulty power supply or a hardware component failure, rather than a configuration error.
Can I reset the BIOS without opening the computer case?
If your motherboard features a rear-panel CMOS reset button, you do not need to open the case. However, most standard motherboards require you to access the internal jumpers or the battery. If you lack a rear button, opening the side panel is usually necessary to perform the reset.
How long should I wait for the CMOS to clear?
While some systems clear almost instantly when using a jumper, it is best to wait at least five minutes if you are removing the battery. This ensures that any remaining electrical charge in the capacitors is fully drained, guaranteeing that the memory is wiped clean before you restart.
Final Considerations
Learning how to reset motherboard settings is a fundamental skill that every PC builder should possess. By understanding these methods, you gain the ability to recover from configuration errors and restore your system to a functional state without needing external technical support. Always remember to perform these steps with the power disconnected and prioritize static safety to keep your components in top condition.
If you find yourself needing to perform this action frequently, it might indicate that your system is unstable due to aggressive hardware settings or that your battery is failing and needs to be replaced. Take your time, follow the steps carefully, and you will have your system running smoothly again in no time.



