


If you have recently attempted to upgrade to Windows 11 or are trying to run specific anti-cheat software, you have likely encountered a requirement for Secure Boot. Learning how to turn on secure boot on asus motherboard systems is a common hurdle for many users, especially since ASUS BIOS interfaces can vary significantly between older models and modern UEFI layouts.
This process involves accessing your motherboard firmware settings to ensure your system only boots using trusted software, which helps protect your PC from malicious rootkits during the startup process. By following these steps, you will be able to verify your current boot state and modify the necessary parameters to satisfy modern security requirements.
Understanding the Role of Secure Boot
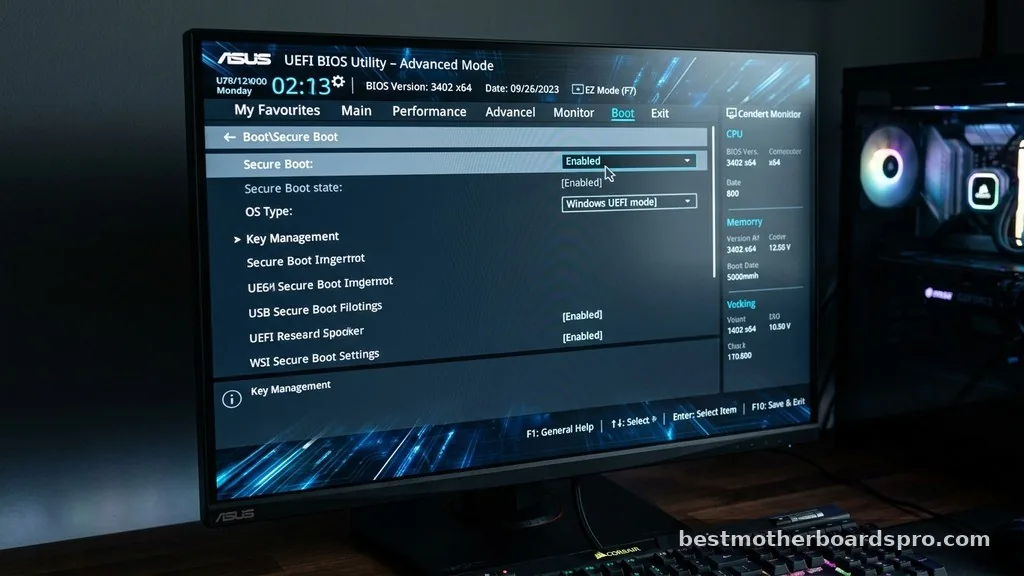
Secure Boot acts as a digital gatekeeper for your computer. It is a security standard developed by the PC industry to ensure that a device boots using only software that is trusted by the Original Equipment Manufacturer (OEM).
When you power on your machine, the firmware checks the signature of each piece of boot software, including UEFI firmware drivers, EFI applications, and the operating system itself. If the signatures are valid, the computer boots; if they are not, the system will block the process to prevent unauthorized code from executing.
For most users, this feature is essential for meeting the hardware requirements of Windows 11. Without it, the Windows installation media or system health check tools will report that your PC is unsupported. Beyond compatibility, it provides a layer of protection against malware that tries to compromise the boot sequence before your antivirus software even has a chance to load.
Preparing to Access the ASUS UEFI BIOS
Before you can change any settings, you need to enter the BIOS or UEFI interface. ASUS motherboards typically use a specific key during the initial power-on self-test (POST) phase.
- Shut down your computer completely.
- Press the power button to turn it on.
- Immediately and repeatedly press the Delete key or the F2 key on your keyboard.
- Keep tapping until the graphical BIOS screen appears.
If you find that your computer boots directly into Windows, you may have “Fast Boot” enabled, which skips the BIOS detection screen. In that case, you can access the menu through Windows settings.
Go to Settings, navigate to Update & Security, select Recovery, and under Advanced Startup, click “Restart Now.” Once the computer reboots to the blue options menu, select Troubleshoot, then Advanced Options, and finally UEFI Firmware Settings.
Configuring Secure Boot Settings
Once you are inside the BIOS, the interface will likely be in “EZ Mode.” You need to switch to “Advanced Mode” to find the security settings. You can usually do this by pressing F7 or clicking the button labeled “Advanced Mode” at the bottom of the screen.
After entering Advanced Mode, look for the “Boot” tab in the top menu bar. Inside the Boot menu, scroll down until you see the “Secure Boot” section. If you do not see it immediately, look for a submenu labeled “Key Management” or “Secure Boot Control.”
Adjusting the Secure Boot Mode
When you click on Secure Boot, you will see the current status of your system. If it says “Disabled,” you need to change the mode. In many ASUS BIOS versions, there are two primary modes: “Standard” and “Custom.”
For most users, the Standard mode is sufficient. If you are unable to toggle the setting because it is greyed out, you may need to adjust your CSM (Compatibility Support Module) settings first. Secure Boot and CSM are often mutually exclusive; if CSM is enabled, Secure Boot will remain locked.
Go back to the Boot menu, find “CSM (Compatibility Support Module),” and ensure it is set to “Disabled.” After disabling CSM, save your changes, exit, and re-enter the BIOS. You should then find that the Secure Boot option is no longer greyed out.
Managing Keys and Certificates
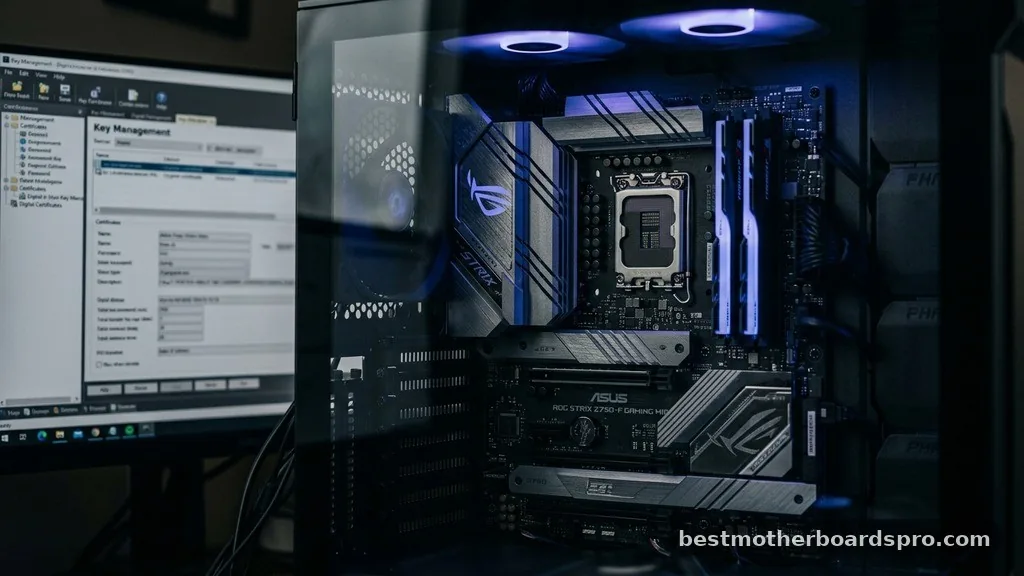
Sometimes, you may need to clear or restore factory keys if your system refuses to acknowledge the Secure Boot state. This is common if you have previously installed non-signed drivers or modified the boot environment. Within the Secure Boot menu, you will see an option for “Key Management.”
| Setting | Function | Recommended Action |
|---|---|---|
| Secure Boot Mode | Determines if keys are standard or custom | Set to Standard |
| CSM Support | Allows legacy BIOS compatibility | Disabled |
| Platform Key (PK) | Root of trust for the firmware | Install default keys |
If you are stuck, selecting “Install Default Secure Boot keys” is usually the safest path. This will reset the platform keys to the ASUS factory defaults, which are recognized by Windows. Always read the on-screen prompts carefully before confirming, as resetting keys can occasionally affect how your system handles third-party hardware drivers.
Troubleshooting Common Issues
If you have followed the steps but still cannot get the system to report as secure, consider these frequent roadblocks. Sometimes the BIOS version itself is outdated.
ASUS frequently releases firmware updates that improve compatibility with Windows 11 and refine the security settings menu. Check the ASUS support website for your specific motherboard model to see if a BIOS flash is available.
Another issue involves the partition style of your primary hard drive. Secure Boot requires your drive to be formatted as GPT (GUID Partition Table).
If your drive is still using the older MBR (Master Boot Record) format, the system will fail to boot if you turn on Secure Boot. You can use the “MBR2GPT” tool provided by Microsoft to convert your drive without losing data, though you should always back up your files before attempting this.
Saving and Exiting
After you have ensured that CSM is disabled and Secure Boot is set to enabled, you must save your changes. Do not simply turn off the computer. Press the F10 key on your keyboard to open the “Save & Exit” dialog box.
This will show you a list of the changes you have made. Confirm that the Secure Boot status is listed as “Enabled.”
Once you click “Yes,” the computer will restart. Upon loading back into Windows, you can verify that the change was successful by typing “System Information” into the Windows search bar and checking the “Secure Boot State” field.
Frequently Asked Questions
Why is the Secure Boot option greyed out in my ASUS BIOS?
The option is typically greyed out because the Compatibility Support Module (CSM) is currently enabled. Secure Boot requires UEFI mode, which conflicts with CSM. You must navigate to the Boot menu, set CSM to Disabled, and save your changes before the Secure Boot option becomes editable.
Do I need to enable Secure Boot for Windows 11?
Yes, Secure Boot is a mandatory requirement for Windows 11. The operating system uses it to ensure that the boot process is protected against rootkits and other low-level threats. Without enabling this feature in your BIOS, Windows 11 will likely refuse to install or run correctly.
Will turning on Secure Boot delete my data?
No, enabling Secure Boot does not delete your personal files or installed applications. However, if your drive is currently partitioned as MBR instead of GPT, the system will not boot after enabling this setting. You must convert your disk to GPT format to maintain access to your data.
What should I do if my PC fails to boot after enabling Secure Boot?
If your PC fails to boot, it is likely because your OS drive is formatted as MBR. You can resolve this by entering the BIOS, re-enabling CSM to regain access to Windows, and then using the Windows MBR2GPT conversion tool to switch your drive to the required GPT partition style.
Final Thoughts
Correctly configuring your firmware settings is a straightforward task once you understand the relationship between the boot mode and your drive’s partition structure. By ensuring your ASUS motherboard is set to UEFI with CSM disabled, you satisfy the security prerequisites for modern operating systems and protect your machine from unauthorized software. If you run into issues, remember that the BIOS interface is designed to be safe; you can always revert your changes if something does not work as expected.
Taking the time to learn how to turn on secure boot on asus motherboard hardware ensures your system remains compliant and protected. Feel free to explore your BIOS further to see what other performance or security features might benefit your specific computing setup.
