
Whether you are planning a hardware upgrade, troubleshooting a driver conflict, or simply curious about your system‘s architecture, knowing exactly how to find out motherboard model information is essential. You do not need to be a technical expert to retrieve these details, as your operating system keeps this data readily available.
By using a few built-in tools or performing a quick physical inspection, you can identify the specific board powering your computer in just a few minutes. This process is straightforward, and once you have the identification, you can easily track down compatible updates or technical specifications for your machine.
Using Windows Command Prompt to Identify Your Board
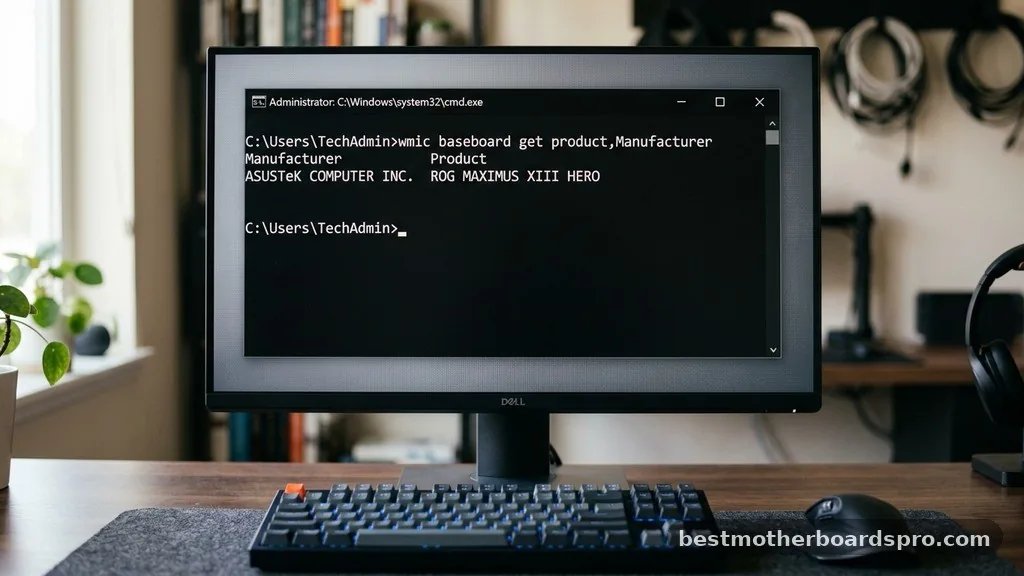
The fastest way to retrieve your hardware details is through the Command Prompt. This method is reliable because it queries the system directly for the information stored in the BIOS. You do not need to install any third-party software to access these system strings.
To begin, press the Windows key and type “cmd” into the search bar. Once the terminal window opens, you will need to input a specific command to query the System Management BIOS (SMBIOS). Type the following line exactly:
wmic baseboard get product,Manufacturer,version,serialnumber
After you press Enter, the system will display the manufacturer, the exact model name, the version, and the serial number of your board. This text output is clean and provides the foundational data you need to search for support pages or manual downloads. If the output appears as “To be filled by O.E.M,” it usually means you are using a pre-built computer from a major manufacturer like Dell or HP, in which case you should look for the system model number instead.
System Information Utility for Quick Identification
If you prefer a graphical interface over a command-line terminal, the built-in System Information tool is your best option. This utility aggregates various hardware parameters into a single, scrollable window, making it very easy to read.
Open the search bar and type “System Information” to launch the application. Once the window appears, ensure the “System Summary” category is selected in the left-hand pane. On the right side, scroll down until you locate the fields labeled “BaseBoard Manufacturer,” “BaseBoard Product,” and “BaseBoard Version.”
These labels provide the primary identification for your mainboard. This method is particularly useful because it presents the data clearly without requiring you to remember specific command-line strings. It is a highly effective way to confirm your hardware specifications before purchasing new components like RAM or a CPU.
Checking the UEFI BIOS for Hardware Details
Sometimes, you may need to know your hardware specifications before the operating system even loads. Accessing the UEFI BIOS is the standard way to do this, especially if you are troubleshooting a system that fails to boot into Windows.
To enter the BIOS, restart your computer and repeatedly press the designated key—usually Delete, F2, F10, or F12—immediately after the screen lights up. Once you are inside the BIOS interface, look for a section labeled “System Information,” “Main,” or “About.”
The board name and manufacturer are almost always listed prominently on this screen. Navigating the BIOS is an excellent way to see the hardware configuration without worrying about driver interference or software errors. Keep in mind that every manufacturer, such as ASUS, MSI, or Gigabyte, uses a slightly different layout, so you may need to look around the menus for a few seconds to find the exact model string.
Physical Inspection of the Circuit Board
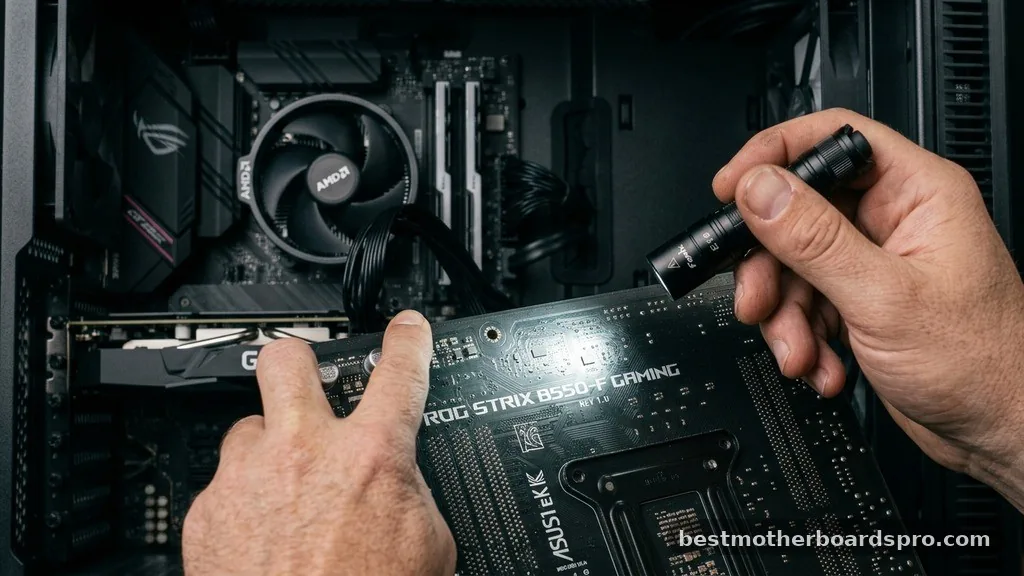
When software methods fail or if the computer is not powered on, you can perform a physical inspection. This is the most accurate method because the board manufacturer typically stamps the model name directly onto the PCB (printed circuit board).
To inspect the board, you will need to open your computer case. Ensure the machine is completely powered off and unplugged from the wall before you begin. Once the side panel is removed, look for the text printed in white or gold directly on the surface of the board.
- Check near the RAM slots for a model name or series number.
- Look around the CPU socket area where labeling is often prominent.
- Search for a small sticker near the PCIe expansion slots.
- Inspect the area between the board’s heatsinks for identifying text.
Be careful not to touch any sensitive components while looking for the board name. If the board is covered by a large graphics card or a bulky CPU cooler, you might need a flashlight or a phone camera to get a good angle on the printed labels.
Comparing Identification Methods
Choosing the right approach depends on the state of your computer. The following table compares the efficiency and convenience of each method mentioned above.
| Method | Ease of Use | Requires Power | Best For |
|---|---|---|---|
| Command Prompt | High | Yes | Fast, text-based retrieval |
| System Information | High | Yes | GUI-based quick checks |
| UEFI BIOS | Medium | Yes | Pre-boot troubleshooting |
| Physical Inspection | Low | No | Dead or non-booting systems |
Addressing Common Identification Gaps
Many users encounter confusion when their system reports a generic name rather than a specific retail model. This often happens with proprietary boards found in pre-built systems from companies like Dell, Lenovo, or HP. If your system returns a generic board name, the best way to get accurate information is to search for your computer’s specific model number on the manufacturer’s official support website.
Another common gap occurs when software reports the “System Model” instead of the “BaseBoard Product.” To ensure you are looking at the right data, always check the “BaseBoard” prefix in the Windows System Information tool.
This distinction is vital because the system model refers to the entire computer, while the baseboard model refers specifically to the motherboard. If you are still struggling to identify the board, third-party tools like CPU-Z can often pull more granular data from the SPD and DMI tables that native Windows tools might occasionally skip.
Frequently Asked Questions
Will the BIOS tell me what motherboard I have?
Yes, entering the UEFI BIOS is one of the most reliable ways to see your hardware details. Most modern BIOS interfaces display the motherboard manufacturer and model name directly on the home screen or within a dedicated system information tab, which is accessible even without an operating system installed.
How do I find my motherboard model using CMD?
You can use the Command Prompt to find your board by typing “wmic baseboard get product,Manufacturer” and pressing Enter. This command queries the system registry for the specific product name and manufacturer, displaying the information instantly in the terminal window without needing any external software or complex menus.
Can I check my motherboard model without opening the PC?
Absolutely. You can use the Windows System Information tool, the Command Prompt, or even third-party diagnostic utilities to retrieve your motherboard model name while the computer is running. These software-based methods are significantly easier and safer than opening your computer case for a physical inspection of the hardware.
Why does my PC show a generic motherboard name?
If your system shows a generic name, it is likely a pre-built computer from a major brand like Dell or HP. These companies often use custom-designed boards that do not follow standard retail naming conventions. In these cases, you should search for the computer’s serial number on the manufacturer’s website.
Summary of Hardware Identification
Knowing how to find out motherboard model information gives you full control over your PC’s maintenance and upgrade path. Whether you utilize the quick Command Prompt method, the intuitive System Information app, the BIOS interface, or a physical look inside the chassis, you now have the tools to identify your specific hardware accurately. Remember that software methods are usually the fastest, while physical inspection remains the final authority for damaged or non-functional systems.
Once you have successfully verified your board details, you can confidently proceed with driver updates or hardware enhancements. If you encounter any further trouble identifying your specific board, feel free to reach out to the manufacturer’s support forums for additional assistance with your unique system configuration.